


While there are tons of pictures everywhere of this look, I didn't find many detailing HOW they went about doing the process. For those that are creatively challenged (like me!) I thought it would be helpful to see it in a step by step format:
(1) In order to accomplish the look, I had to do some prep work. First, I had swatches of quite a few different fabrics. Etsy, Hobby Lobby, or Hancock fabrics are a good place to achieve this. I went ahead and got all the fabrics from the Kumari Garden Fabric Collection since Gloria's bedding is made with this as well.

Hobby Lobby and Hancock Fabrics have "swatch" bundles where they do the work for you of getting ones that go well together. I got REALLY lucky with my fabrics because the lady that's making Gloria's bumper was running a couple weeks behind and offered to send these fabrics at no cost to me to make up that tiny dilemma. I ended up saving quite a bit of money by doing this and she kept a customer happy! ; )
(2) After getting the fabrics, then buy the hoops. I've read that you can find them at Goodwill and truth be told, I'm rarely available during their business hours so got them at Hobby Lobby. Either way, they're CHEAP. I bought 11 hoops for $10. I got a mixture of sizes, 10 inches around being the largest and 4 inches around being the smallest.
(3) Once you have the hoops, start deciding what fabrics you want in them, and where. It's a good idea to prepare this in the room where you'll be hanging the wall art to get an idea as to how each fabric looks on your paint color.
(4) Once you've figured it out, place the fabric inside the hoop and cut around it, leaving about an inch of fabric.
(5) Then, apply good 'ol Elmers glue to the inside piece of wood and lay the fabric down to create a seal. I put a book over them to ensure it would glue down tightly and left that for a while.
(6) next, arrange! Take your time to figure out how you want it to look on the floor and take a picture to remind yourself where they fall.
(7) Give your hubby kisses as he patiently hangs all of it (with a tiny nail for each hoop). Be picky about the positioning and bat your eyelashes more.
(8) Marvel at your results!

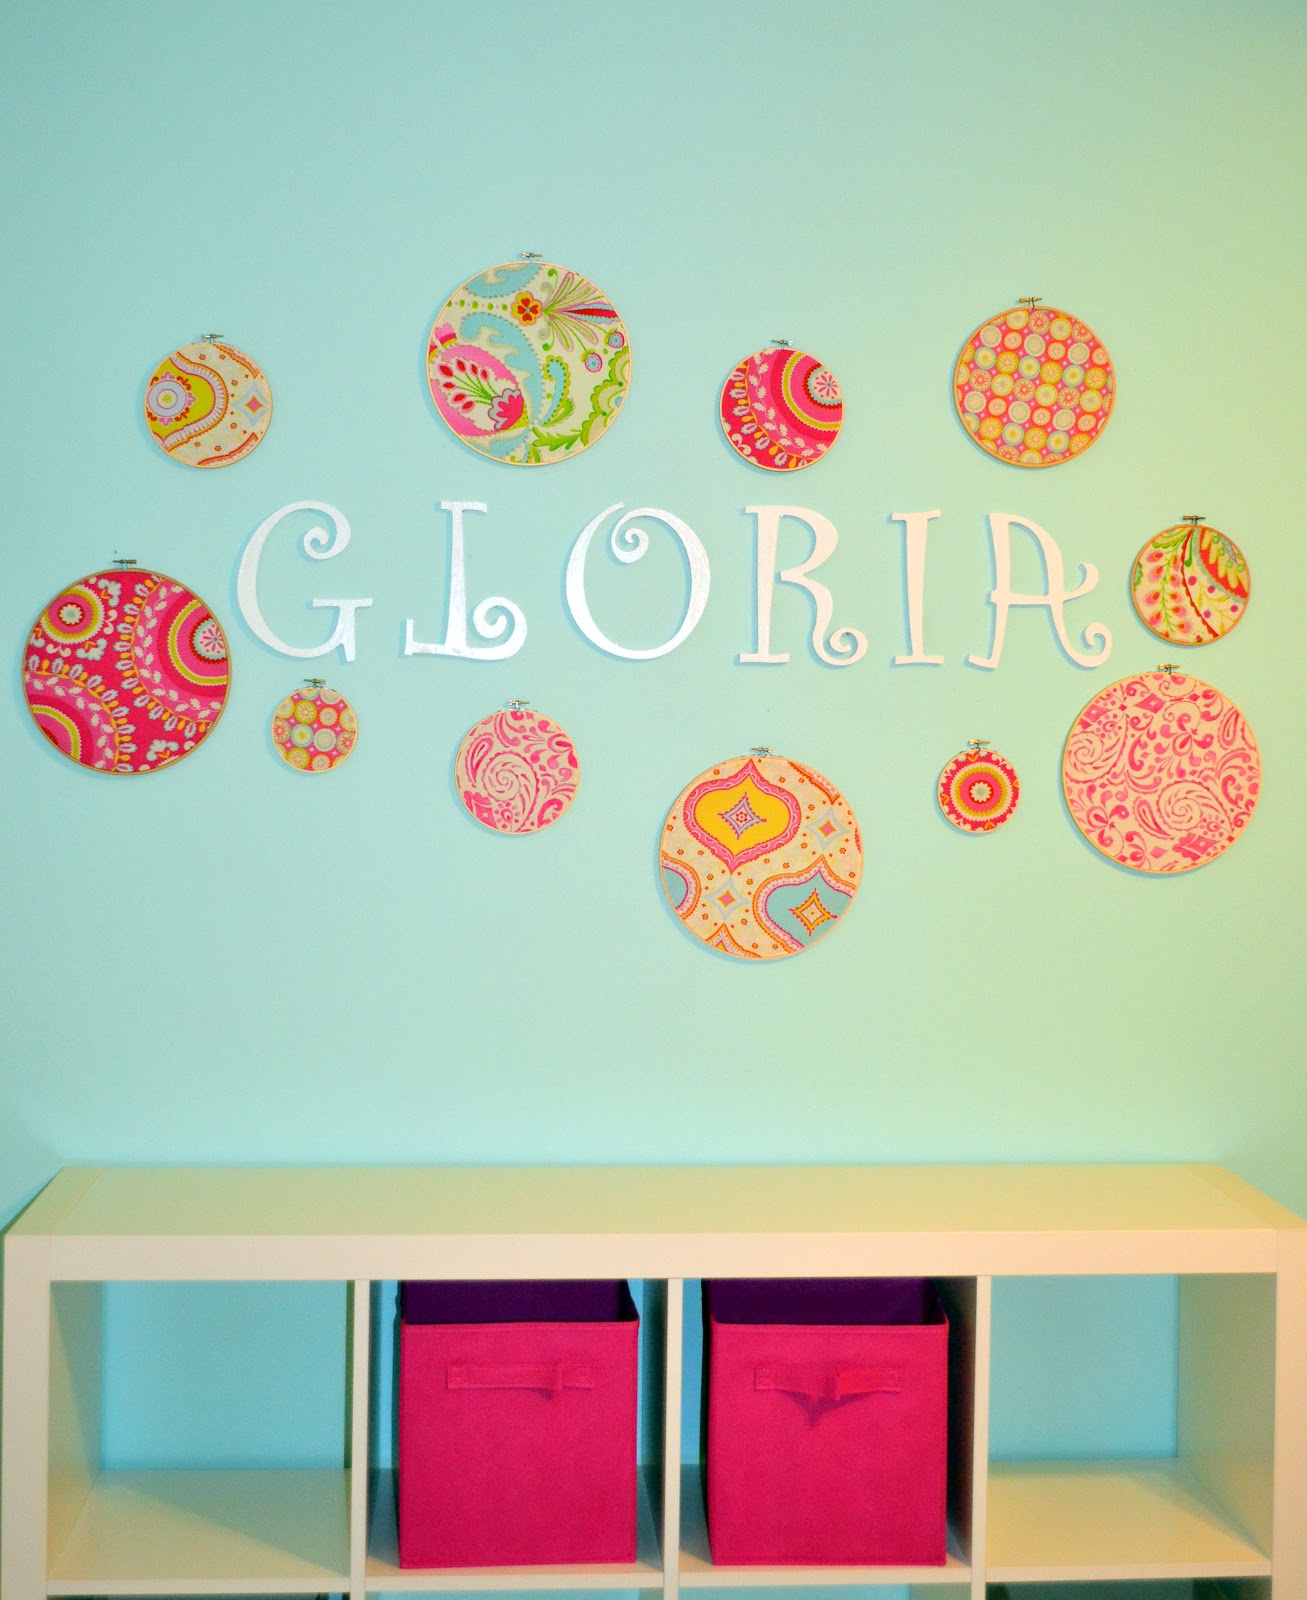

As you can see, this nursery is REALLY coming together! The rug, some decor, and the bumpers should all be arriving within the next couple of days. Can't wait!
Linking to Serenity now.
Linking to Tatertots and Jello.
Linking to DIY Show Off.
Linking to Just us Four.


So pretty. I am excited about having a boy, but times like this a little girl seems like SO much more fun!
ReplyDeleteIt turned out great. I'll have to do this. I'm very good at batting my eyelashes, much to my husband's chagrin.
ReplyDeleteVisiting from Serenity Now bloggy party. I hope you can stop by my blog as well. :)
Thanks for sharing,
Laura
Followed over from Serenity. Love your hoop wall. I have been collecting thrift store hoops for about two years waiting for the right project to hit me. How simple is your idea and you provided super-clear instructions on how to make the back neat! Thanks!
ReplyDeleteThis is a great project! I love the fabrics you chose! Would you consider linking it up to my Pinworthy Projects Linky Party over at Just Us Four?
ReplyDelete